Easter Pom Pom Bunnies DIY
An iconic craft from my own childhood was creating pom pom bunnies for Easter and I’m excited to bring you the step by steps to make your own this Spring!
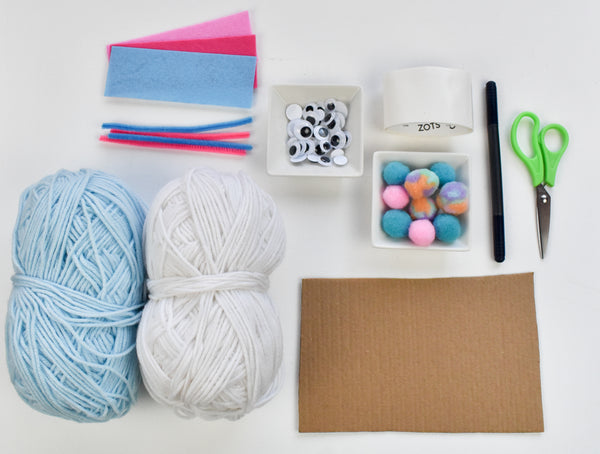
Using a collection of embellishments from the Kid Made Modern Arts and Crafts Library with any color yarn you most likely have in your craft supply collection already, these little bunnies are a simple craft with an adorable impact!
I love the idea of making an entire bunny family in every color of the pastel rainbow, filling a fireplace mantel or shelf with all your handmade creatures and being able to play with them year after year.
So, gather your supplies from the list below and let’s getting hopping on this Easter craft!
Materials Needed:
-
Kid Made Modern Arts + Crafts Library
- Fuzzy Sticks
- Felt
- Googly Eyes
- Pom Poms
- Scissors
- Yarn
- Cardboard
- Marker
- Glue Dots

Instructions:
Step 1
To craft your pom pom bunny, we’ll begin with creating a cardboard template to make the pom poms themselves.
Draw the top of a block printed, capital letter H on your piece of cardboard like the image and cut it out.

Make a second template in the exact same style but twice the width, this will give you two different size pom poms.

Step 2
Using the small template and your yarn, hold one end of the yarn on one prong of the cardboard template and wrap the yarn around both prongs until you have a thick bundle of yarn at the top of your template.
Be sure leave room to still see the cut-out portion in the center of the prongs.

Step 3
Cut a 6” piece of yarn and insert one end into the center of the cutout portion of the template, tie the two ends of yarn around the center of the yarn bundle.

Step 4
Slide the bundle of yarn off the template and cut all the loops of yarn one either side of the center knot.

Step 5
Your bundle of yarn should now look like rough pom pom, using your scissors, trim all the excess ends of yarn off to create a rounded and fluffy looking pom pom.

Step 6
Follow steps 1-5 on the large template to create a second, larger pom pom.

Step 7
Using 3 glue dots, glue the two pom poms together by stacking the small on top of the large.
Step 8
Draw and cut out two oval shapes from the felt strip, these will then be glued to the bottom of the large pom pom to be bunny feet. Using a black marker, draw 3 lines on the tip of the ovals to create toe lines for the feet.

Step 9
Cut a large fuzzy stick in half and bend each fuzzy stick piece into an oval, attach the ends together with a glue dot. Now add another glue dot on the bottom of each bunny ear and push it into them into the top of the small pom pom sticking up straight.

Step 10
Cut out a tiny circle from the same felt you used for the bunny feet, this will be the perfect bunny nose! Ideally, this felt circle should be the same size or smaller than the googly eyes you’re using for your bunny.
Step 11
Using glue dots, finish gluing on all your additional elements; the felt nose, googly eyes and a medium sized pom pom on the back for a bunny tail.

Now that you created an adorable pom pom bunny, you can make one in every color to play with the whole Spring season! Plus, these fluffy baby bunnies will surely make the cutest Easter gifts that are full of handmade magic!

I hope you had as much as I did making this spring time craft! Happy Easter!
About the Author:
Fiber artist and craft enthusiast, Tessa Anderstrom, is the owner of handmade shop Studio Jane which focuses on sustainably made home décor and handmade art. As an avid DIYer with a passion for learning new skills, Tessa enjoys sharing that knowledge with crafters of all ages.

Featured Articles
Printable Happy Birthday Poster DIY
Get crafty and create a custom birthday sign for your next Birthday Party Parade


0 comments